
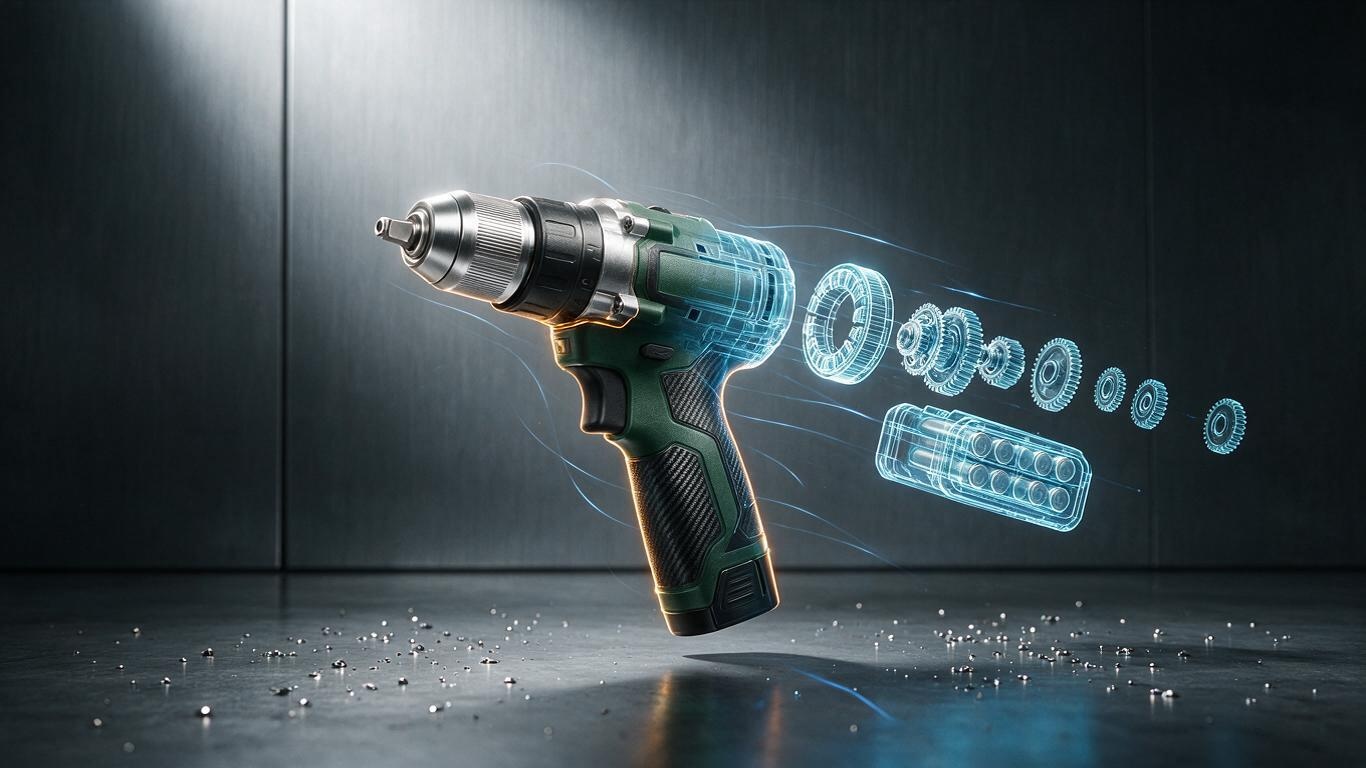
Why the client watched the same drill video three times
Last Friday, the owner of a power-tool brand forwarded us a competitor's clip with a one-line note: "I watched the screw-tightening shot three times." No actors, no live footage — everything from the brushless motor's rotor to the jaws of the metal chuck was rendered. That clip belongs to the most demanding branch of the 3D product animation case study work we take on: the kind that has to explain what happens inside the housing.
The product here is a 20V brushless hammer drill. The brand spent five years as an OEM exporter and launched its own label only last year — which is when the real problem appeared. The spec sheet is genuinely strong: brushless motor, 40N·m of torque, two-speed metal gearbox, variable-speed trigger. Written on a detail page, none of it sticks. The team had tried live action: a model drilling into a plank, four lights, two camera positions, a full day of studio rental — and the most valuable parts of the product were sealed inside the shell, where no lens can reach. So the first decision on this 3D product animation case study was simple: the goal is not to make the drill look good, it is to make the invisible visible.
Below is how we solved it, decision by decision — not a list of software, but the choices that actually shaped the result. If you are sourcing a demo video for an industrial product, a tool or a machine, you can check whether yours is stuck in the same place.
Step one: translate the engineering file into something renderable
Tools have one advantage over cosmetics or food: they already exist as engineering data. The client handed us a STEP assembly of the entire drill — 137 parts. Engineering models guarantee dimensional accuracy, but rendered raw they look terrible: chamfers are too dense, screw threads carry tens of thousands of polygons, and assembly reference planes are still floating inside. Our approach is layered. Parts that appear in close-up — housing, chuck, battery pack — get retopologised and re-UV'd so the surface still feels right. Internal gears, rotor and PCB are simplified down to silhouette and key structure. We break the whole pipeline down in our AI 3D modeling workflow guide; the principle never changes: spend compute where the camera is looking.
Materials took the longest. The housing is PA6-GF30 glass-filled nylon — matte, with a very fine grain that scatters light into a soft haze rather than the oily gloss of a plastic toy. The chuck is a turned metal part with concentric tool marks. We built it in three layers: base colour, grain normal, and a very thin clear coat so edge highlights don't blow out. After enough renders you learn that viewers judge realism by how a surface reacts to light, not by polygon count.
Three shots that carry every selling point
We wrote three shots and no more, because the final cut had to survive as a 15-second vertical clip.
- Hero float (0-3s) — the drill rotates slowly in a dark space, a single top light sweeping across the body to establish shape and brand colour.
- Exploded view (3-8s) — the housing splits along its axis; brushless motor, two-speed gearbox, control board and battery pack drift outward and settle into place. This is the spine of the film: it replaces both the teardown video and the engineer's verbal explanation.
- Torque visualisation (8-15s) — the chuck locks a bit and drives into concrete, with energy lines running from body to chuck and an RPM ring, turning "40N·m, variable speed" into something you can feel.
The lighting is deliberately unglamorous: hard key plus rim light to make metal edges stand up, with the environment pushed dark so the eye never leaves the product. The general rules behind that setup are covered in lighting techniques for product animation.
What ships is not one video, it is an asset kit
Twelve working days, and the delivery was: one 60-second 4K landscape hero film, a 30-second cut, three 15-second vertical edits (structure, torque, runtime), plus nine rendered stills for detail pages and trade-show posters. That "build once, reuse everywhere" logic is identical to the CNC machine tool animation case we produced earlier — for machinery and industrial equipment, filming is expensive and constrained, so assemble the library once and never reshoot when the copy changes.
After the client put the hero film on their homepage and their marketplace A+ pages, two honest numbers came back: average time on the detail page moved from 1m12s to 1m58s, and at a trade show the same animation ran on a loop — sales staff stopped demonstrating with a physical unit because visitors stopped to watch on their own. Neither number is dramatic, but for a brand that just left OEM work, they are enough.
Three things you cannot skip on industrial products
First, structural accuracy beats visual spectacle. Tool audiences include people who know exactly how a gearbox is built; get the assembly order wrong and the comments will tell you. Second, parameters have to be visualised — nobody feels "40N·m" until they see it. Third, keep the client's engineer in the loop. On this project the structural engineer corrected assembly sequence and internal routing at three checkpoints, and the rework time he saved far exceeded the time he spent.
If you have a product whose insides are more interesting than its shell, get in touch, send us the engineering files, and we will come back with a shot list and a realistic budget range.